Caulking windows is one of the best ways to stop drafts in your home. Most homeowners associate caulking with sinks and bathtubs because you see these fixtures daily and replace their caulking more often. Caulking windows is equally important but they're typically part of a larger painting project, so you don't realize the caulking needs to be replacing periodically … not just when you paint your home's exterior.

In fact many part's of your home's exterior have caulking. We'll use caulking windows as an example for this article, and then summarize all the other areas in your home where caulking plays a key role in stopping air (and water) from getting inside.
Caulking Windows at the Seams
Caulking is an old boat-building term (see how they caulk the seams in a wooden boat), used to fill gaps in the wood structure to insure wooden boats would float. Today caulking describes the sealants used to fill gaps between building materials. If these gaps aren't filled, air in the form of drafts can move through the gaps. Water can also get into your home if the seams on the exterior of your house aren't sealed properly.

What Caulking is Used for Windows?
The type of caulking you use for windows depends on many things:
- What material your windows are made from as materials like wood and vinyl have different characteristics. You should start by reviewing the installation requirements of your window's manufacturer.
- What type of siding you have on your house. New siding materials like fiber cement have well defined requirements for installation that cover the size of seams and whether they should or shouldn't be caulked.
- Exterior and interior caulking requirements are also very different.
Read Caulking Confusion: How Many Types of Caulk are There? to find the the best caulk for your upcoming project.
- Exterior – gaps where the window frame meets the window trim (only the sides).
- Exterior – gaps where the window trim connects to the house siding (only the sides).
Note: You should never caulk the space above/below the flashing and siding, as that's how any water that gets trapped behind the siding is able to escape and thus avoid hidden water damage. Where there are weep holes at the bottom of a window, do not caulk these either as they're intended to let water fall to the ground.
- Interior – where the window frame meets the interior trim (all four sides).
- Interior – where the window trim meets the walls (all four sides).

Caulking is needed no matter what type of siding you have – wood, brick, vinyl or stucco (learn caulking basics). The biggest difference will be in how the windows are trimmed out as some windows, typically in homes with stucco siding also have decorative stucco trim.
Experience is everything and my comment above is accurate for custom built home construction and remodeling, where small builders and remodelers rely on customer satisfaction. With my Florida “production builder” house, this didn't happen. Instead the focus of the sub-contractors is to get the job done as quickly as possible … so they cover up mistakes rather than fix them.

When & How to Caulk Windows
When a house is built, caulking is part of the job. The exterior is done after the siding gets installed and before the siding and/or trim is painted. Inside your home, windows are caulked along with other trim like crown molding and baseboards … in prep for painting.
Other major projects that involve caulking windows and doors include:
- When replacing your home's siding and/or windows.
- When painting your home's exterior siding and/or trim.
- When painting a room, check the condition of the caulk and replace as needed.
Wondering what other reasons indicate the need to re-caulk your windows?
- As cool weather arrives, if you feel drafts near your windows, than it's time to inspect your caulking for any of the problems below.
- When a visual inspection shows cracks and/or gaps due to shrinkage.
- If you see any loose caulking, typically found on the window sill or floor.
- If any glass panes move or rattle, it's time to replace the missing or inadequate caulk.
- When you feel moisture or damp wood, that's a sign that water is coming through gaps in the caulking. Paint that is peeling or bubbling is another indicator.

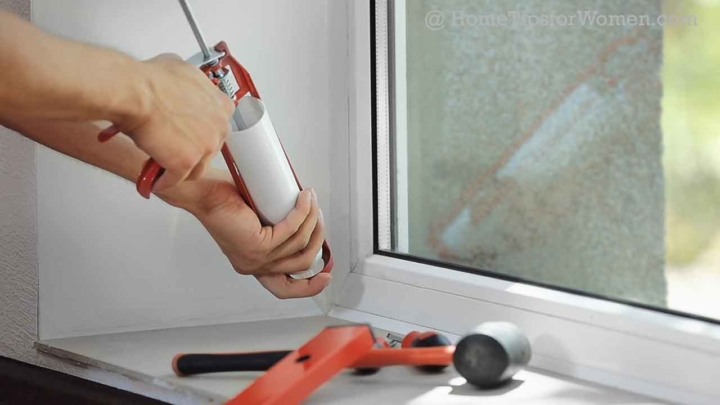
A caulking gun (shown above) has been the go to tool for years as it enables you to lay down a consistent bead of caulking. You'll want a quality caulking gun if this is something you'll be doing for years. Or for small jobs, there are now small 5 or 6 oz tubes of squeezable caulking that are easier to use than a caulking gun.
Here's a simple list of the steps to follow for a perfect caulking line (for more detailed directions, read Learning How to Caulk). Caulking outdoors should be done when temperature is between 45 and 80 degrees Fahrenheit, as this will enable the caulk to stick to the surface and harden correctly.
- Gather your tools (below) and the correct type of caulk or silicone.
- Remove old caulking and clean the surface with rubbing alcohol.
- Use painters tape if a clean line is important to you.
- Run a bead over the seam you want to fill and smooth it with your finger (my handyman technicians wrapped their finger in old, white undershirts).
- Remove the painters tape while the caulk is still wet.
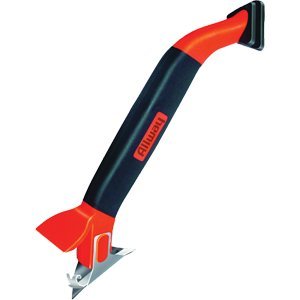
When looking for photos to share, I found the new caulking gun below with the handle in the middle. This should make it easier for women to hold and maneuver, which is important. The painters tape will protect the surface next to the old caulk you're removing, so you don't create a bigger problem when your hand slips.
Ergonomic Caulking Cartridge Dispenser Cauling 3 In 1, Remove
& Smooth Tool Multi-Surface Painters
Masking Tape
Related Projects to Keep Your Home Comfy
Caulking does a great job but it can't do it all. To minimize drafts coming through or around your windows, you'll need more than window caulking:
- Double pane windows will reduce air flow through the glass (read: The Pros & Cons of Replacement Windows).
- Insulation will reduce air flow between the window and the framing (rough opening) used to hold the window in place.
- Weatherstripping will reduce air leaks where the window sash (movable window sections) slides past the window frame.
Good luck with all your home maintenance projects and let me know (comment below) how your caulking project went …


A quick summary about windows was much needed, and that is precisely done here. Intense research was done to figure out how it can be done, and their results are shown here. Further predictions and solutions will be found out.
I am thankful that you’ve shared the best method for caulking windows inside and outside. I love all the details you’ve shared here, and I will share these details with my colleagues now.
When removing old caulking, there are products for softening the old caulking to make removal easier. It will be as hard as concrete if you don’t use it and removal will be very difficult. Just spray on the caulking softener and leave 10-15 minutes. Then you can remove the old stuff easily.
Also remember when choosing caulking – some can be painted, some cannot. So if you need to paint it to blend in with your siding / window etc, remember to check for this.
Love your email … and thanks, as I never heard of these caulking softeners before. The brands on Amazon (like DAP) look reliable, so yes if your caulk is difficult to get off, this extra step should make the job go faster.
Yes, buying caulk is a challenge for homeowners so I wrote this article, Caulking Confusion: How Many Types of Caulk are There?
I enjoyed your article on caulking windows. I would recommend that you edit your articles before you publish. I find it so frustrating to read spelling & grammatical errors.
Bernie, Sorry if you don’t like my rather long sentences … and over time, I am shortening them up as I improve my writing style.
This kind of project can be easier than ever. Use the Finish Line Caulk Tool the next time you caulk. Perfect for small gaps, cracks, and fine lines.