With 8 years experience running a handyman business, my daughter-in-law asked for help finding a reliable roofing company to replace her roof. Emily got three recommended estimates, needed to verify pricing and learn about materials and warranties. She picked the contractor recommended by someone I trust, who was key to restoring my house after it flooded. Emily called this afternoon and asked me to come over, to see if the replacement roof was installed properly?

This article identifies the problems found with this replacement and the actions planned to resolve them. Please wish me luck.

When Roofing Shingles are Different Colors?
When a roof is installed, you want to save one or 2 bundles, to insure you have shingles that are the right color, for future repairs. If you have to buy new shingles, you often end up with a roof that looks like this one … because the colors don't match.
How does this happen?
Shingle manufacturers blend different color granules to surface shingles to minimize color matching problems. However, if you place shingles from different dye lots next to one another, the variation in shading may be visible and detract from the roof's appearance. FineHomeBuilding.com's article, Avoiding Shingle Color Variations, explains how to avoid this.

Does the Roof Have a Consistent Pattern?
When picking materials for a replacement roof, you want a color and pattern that works well with your home's exterior. Asphalt shingles themselves have a pattern but it's up to the installers to lay the shingles out properly to create a pleasing pattern.
Some of the installation rules to create a roof that looks good include:
- Snapping chalk lines to insure the rows of shingles are level from one side of the roof, to the other side.
- Maintaining a consistent row height for all shingles, from the bottom of the roof to the top of the replacement roof.
- Staggering shingles at regular intervals to maintain a consistent pattern across the roof, horizontally and vertically.
- When needed, shingles should be trimmed to maintain the pattern from one shingle to the next shingle … but was this done?
This replacement roof using architectural shingles has NO pattern!

Are Rows of Shingles Level & Equal Height?
I cringe writing about what is wrong with this replacement roof … as just about everything was done wrong. As we're meeting with the owner of the roofing company in a half hour, I'll be brief for now. There are more photos to be taken too … as somehow there were 4 rolls of underlayment left over but no shingles?
- The rows of shingles are noticeably wavy which is easy to avoid by snapping chalk lines to insure proper placement of shingles horizontally. What did I learn?
- They did snap chalk lines and the company owner stated the lines were straight when viewed from above. From a ladder they looked better but I wanted to understand what is causing the wavy look? Drawing the red lines below, I could finally see that it's mostly due to the design of the shingles, because of the gaps and shadows between the single and double layers of asphalt. It's possible you wouldn't notice this if the rows where the same height and ugly bits weren't sticking up here and there, but that's my best guess.

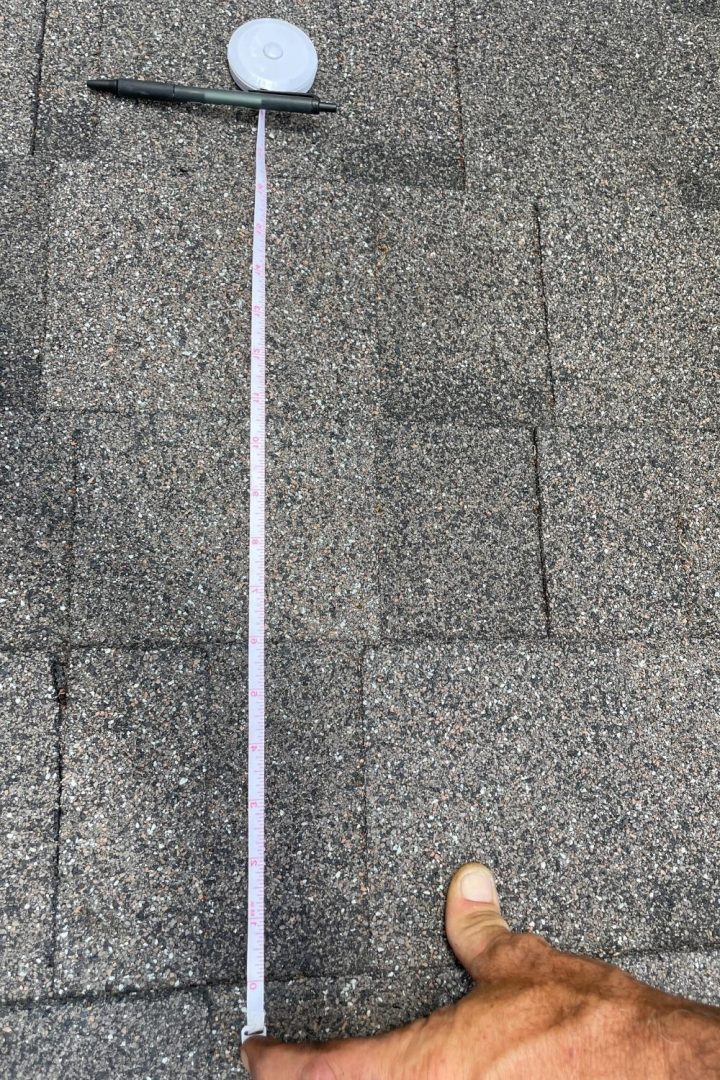
- The height of the rows varies in a number of places (purple rectangles above) and this looks ridiculous. A quick trip up a ladder confirmed what I was seeing. With a tape measure I looked at three rows of shingles and found … from top to bottom, the rows were 5.5 inches, 4.5 inches and 6 inches.

- There are a significant number of small stubs (the red boxes above) throughout the roof which should not be there! If you're using new shingles, there should only be seams between two strips every 41 inches (shingles are 40 7/8 in by 13 3/4 inches). There are ways to avoid this problem:
- You can trim off the nubs that are less than two inches, but that takes time and the trades like to say, time = money.
- You can discard the remnant (called trim in diagram below) shingle pieces to avoid too many seams. But most contractors will squeeze every nickel out of a job and that means using leftovers to save a few bucks.
- When using remnant pieces, this needs to be done on the least visible part of the roof. Unfortunately this crew didn't care about details like this and there was no onsite quality control by a project manager. These remnants are on the front of the roof … not the gable end, but the roof you see from the street!

Installed Correctly – Shingles, Drip Edge, Vent Pipe Boots?
While I'm familiar with everything from the roof deck to the shingles, drip edge and ridge vents (read: Roofing Layers: What's Under Your Shingles), I've never personally dealt with replacing a vent pipe boot. So it was time to do some research because:

- The shingles had the required six nails per shingle, for the 20 shingles I checked and about 80% were done right. Spacing was rather sloppy and the second row of nails on top from the shingles in the row above were less consistent, averaging maybe 4 nails per shingle but I'm not sure what the building code calls for here.
- The drip edge appeared to be installed correctly. I learned from a county building inspector, that in Florida the roof edges need to be cemented to help prevent lift during hurricanes.
- The contract listed seven “pipe-vents boots (2-4″GN, 103 LB, 3-2″ LB 1-10″ GN) but only two bathroom exhaust kits were installed. The other vent-pipes were simply ignored for … here are my best guesses:
- The install team was not given any rubber boots to place over the vent pipes although there were several (2 or 3) exhaust kits left in the garage.
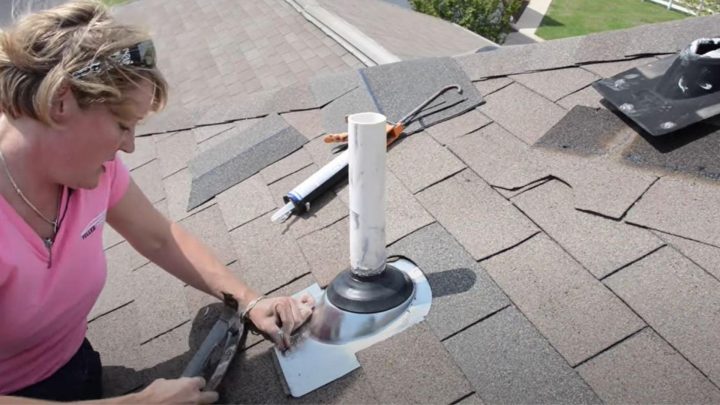
- The install team ignored adding rubber boots to the vent pipes because it requires extra time to measure and cut shingles to fit around the boot, to keep rain water from running under the shingles below the pipe. Learn more about What's a Roof Boot & Why Is It Important to a Home? from ExteriorPros in Washington DC.
When I questioned the roofing company owner about the lack of vent pipe boots, he brushed it off saying they're lead pipes, not PVC, so they … don't need boots? Most homeowners would accept this answer but it's wrong.
Roof boots fit snugly around a vent pipe and get integrated into the shingle layout to prevent water from getting into your house through the gaps around the vent pipe. My recommendation to my daughter-in-law is not to pay the bill until the job is done … as all 3 estimates stated the boots would be replaced, and the other two estimates documented that they were lead pipes!
- Estimate #2 – Remove/replace lead boots, vents, goosenecks and
- Estimate #3 – Flashing – pipe jack – lead (quantity 4).

Why are Shingle Edges Ragged?
This problem isn't critical but it's included here for two reasons (here's a video on Cutting Shingles On a Gable Roof):
- To show readers the right way to trim the edges of a roof using a straight edge versus the freehand approach taken on this roof. You can see a piece of a shingle sticking out from the roof on the left and more difficult to show are the wavy cuts where you can see the drip edge where it should have been covered by the shingles.

What's Happened Since …
The story isn't over so here's what's been done so far:
- When we discussed the two different color shingles, the company owner claimed he could get the manufacturer to replace the shingles installed that were the wrong (different) color … although the owner admitted they don't check dye lots before they send the shingles out. They expect the installers to do this?
- Amazingly someone showed up the next day with shingles the correct color and replaced about 10 bundles or 300 square feet over the next two days. To me this proves they were simply sloppy about packing up the shingles for our job … along with no boots for the vent pipes.

- Now we're debating work outstanding and valid cost overruns. My fear is the company owner is trying to get us to pay for replacing the shingles that were the wrong color.


Leave a Reply