 Wondering what home renovations you can do yourself? Maybe you’re not the handiest with a hammer or power drill and you're not alone. I'll use them these tools, but I'm a much better writer than handywoman. Fortunately not all home renovations require special skills. Some skills aren’t too difficult to learn and my best advice, is to develop the homeowner skills you'll use over and over.
Everyone starts somewhere, and if you didn't have an opportunity growing up to learn these skills, accept that it's all about practice, practice and more practice. Even the women on remodeling TV shows, you know the ones who have an uncanny knack for it, have spent lots of time perfecting their skills.
You don’t always need a contractor to make changes in your home. All you need is some knowledge plus the right tools and materials for the job, and time to practice so you're happy with the results of your hard work.
Here are 2 jobs to think about. One of them is often overlooked, but makes a huge difference. The other might seem out of your reach, but it’s probably not.
A Great Paint Job Starts By Fixing Wall Imperfections
Project Difficulty: Slightly challenging
 One of the easiest home renovations is painting. Almost anyone can wield a paintbrush or roller to change the color of a wall. But if your walls have bumps or small to medium-size holes, paint won’t make them look great again. The difference between a gorgeous paint job and one that doesn’t do much besides change the color of a room, begins with preparation and that's what most people don't understand.
And the bigger focal point the walls are, like this blue accent wall, the more you'll want them to be perfect. Most lumps and bumps will show through new paint, so give yourself the smoothest start — sand them down using fine-grit sandpaper. While you’re at it, fill nail holes with spackle or drywall joint compound. You’ll be glad you did, I promise.
Large holes, like from a doorknob that’s hit the wall, take a bit more work. There are several ways to repair them, but one of the simplest is with a hole patch, which is a small, thin sheet of perforated metal that’s made for the job. You can find them where painting supplies are sold.
Spread drywall joint compound on the wall around the hole, then press the sheet over the hole and into the joint compound and let it dry. Once dry, spread more compound over the whole repair, then let it dry and sand smooth.
Once you’re ready for paint, apply a coat of paint primer over the repairs, or over the whole wall. This gives your paint the best foundation and for more painting tips, click here …
Popular Home Renovations: Tile Backsplash
Project Difficulty: Slightly challenging, but worth it
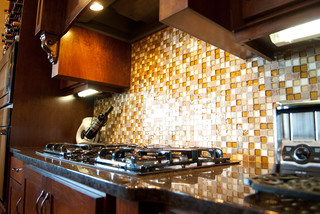
 No kidding, you can set tile and make it look fantastic, and a backsplash is a perfect place to start. Backsplashes don’t need any special underlayment, unlike floors and showers, and there’s no kneeling, which can hurt your knees and back.
To tile your backsplash with small square or round penny mosaics (get more ideas for tile backsplashes or visit Pinterest), you’ll need coarse sandpaper, scissors, a measuring tape, premixed tile adhesive, a notched trowel, grout, and a grout float. That’s about it, aside from a few common things you probably have around the house.
Sand down the painted wall and wipe off the dust, then measure the area where the tile will fit. You can cut the sheets of mosaics to the right size using scissors to fit into small spaces. Size precision isn't critical because gaps around the perimeter are minimal with tiles as small as these.
Next, spread tile adhesive on the wall using the notched edge of a trowel, which applies the right amount of adhesive. All that’s left to do is press the mosaic sheets in place, wait for the adhesive to dry, and then grout them.
 Grouting isn’t hard, but it’s important to get it right. Scoop up grout on the edge of the grout float, which looks like a rectangular paddle with dense foam on one side, and spread it across the tiles. Then drag the float back and forth at 45-degree angles across the tiles to scrape off the excess. In about 30 minutes, wipe down the tiles with a damp sponge. Once there’s a powdery haze on the tiles, wipe that off with a clean, dry rag and you’re done.
Tips on tile adhesives: Thin-set mortar is usually the tile adhesive of choice, no matter the job. Premixed takes longer to dry, and doesn’t have the same strength. But premixed is fine on a backsplash, and it leaves you with less to measure and mix.
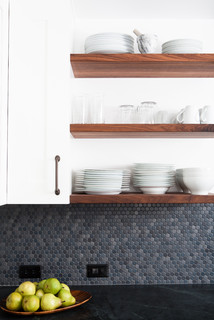
Tips on grout: Mix the grout with water in a plastic container immediately before you use it. Once it hardens, it’s unusable. Grout can blend with or contrast against the tile, like this gray-on-gray penny tile look.
Home renovations come in all shapes and sizes. Some of the smallest changes can make the biggest impact, too. It’s empowering to take on a job, then stand back and smile because it’s beautiful. You did it, and you know that you can do more.
Before you know it, you might want to take on tiling a floor, installing new light fixtures, or something even bigger. Every update makes your home a little better, and every project makes you a little wiser.
What home renovations are you considering?
… and what help do you need getting started?


Leave a Reply